Electricity is an essential part of our daily lives, and it is important to know how to use it safely. A multimeter is a tool that can help you determine the voltage of live wires, which is crucial information for anyone working with electricity. Multimeters are used to measure a variety of electrical quantities, including voltage, current, and resistance.
In this guide, we will focus on how to use a multimeter to test voltage of live wires. Whether you are a professional electrician or a DIY enthusiast, this guide will provide you with the basic knowledge needed to use a multimeter safely and accurately. With this information, you can ensure that you are taking the necessary precautions when working with electricity, and avoid any potentially dangerous situations.
Before you jump right into this blog, if you’re having trouble with a Ryobi battery, be sure to read our guide for helpful tips and tricks.
Safety Precautions
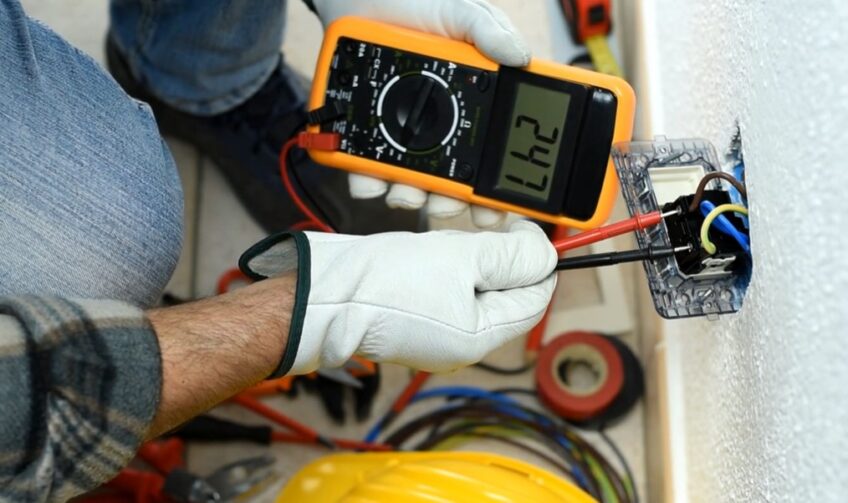
Before attempting to use a multimeter to measure the voltage of live wires, it is essential to take the proper safety precautions for your own safety. Always wear the necessary protective gear, such as protective eyewear, rubber gloves, and insulated boots.
Make sure to disconnect the circuit from all power sources and never touch the circuit if the power is still on.
Wear protective gear
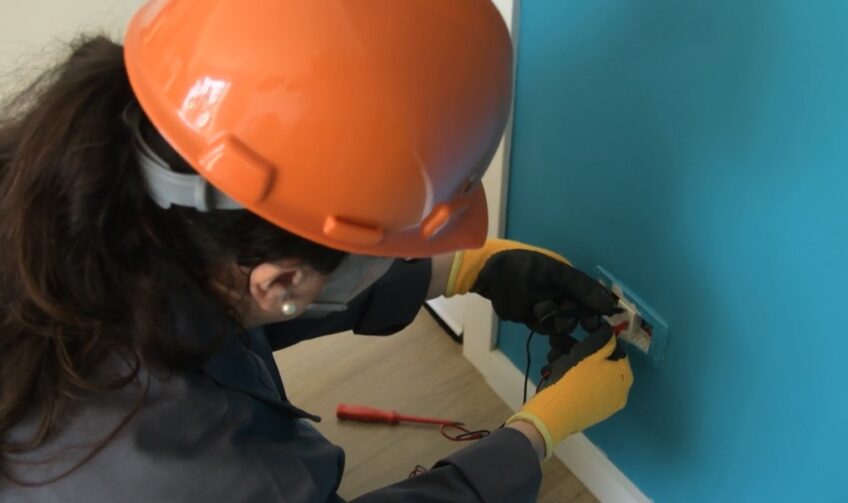
When working with electricity, it is essential to take proper safety precautions. Before working on any live electrical system, make sure the circuit is de-energized. Wear the proper personal protective equipment such as fire retardant work clothing, fully shielded goggles, and rubber gloves rated for the voltage you are test-checking.
Never touch uncovered electrical components or wires while a meter is connected to them. Do not assume anything about the system you are working on; always test straps, terminals, connections and switches for voltage before starting work.
Keep Multimeter probes away from energized conductors when disconnecting or connecting them; contact should always be made first with insulated test points. Make sure all covers and safety devices are securely replaced after repair or inspection has been completed.
Turn off the power source
Before beginning any electrical work, it is essential to take proper safety precautions. When using a multimeter to test the voltage of live wires in an electrical component or system, always make sure the power is turned off before attempting the tests.
To ensure full power has been disconnected, it is recommended that you first remove any fuses or breakers associated with the device, appliance, circuit or system you are testing.
Additionally, some appliances may be equipped with a safety switch, so make sure that switch is completely turned off as well. Never assume any appliance disconnected from power sources still has no remaining charge; always double-check all sources of electricity have been switched off first.
When working on live wires in an area that contains several breakers and fuses for multiple outlets and lights it’s important to properly identify where each one goes and to disconnect them all before testing in order to guarantee you have complete power shutdown. To err on the side of caution it is wise to unplug as many appliances from sockets near your work area as possible before attempting any tests so there remains no risk of electricity shock or surge.
Ensure the multimeter is set to the correct voltage range
Using a multimeter to test the voltage of live wires is an important yet potentially dangerous task. It is critical that the correct precautions and procedures be taken in order to ensure that no injury occurs during testing.
The first precaution when using a multimeter to measure the voltage of live wires is to make sure that the device is set to the correct voltage range for safety and accuracy. Before connecting anything, verify that your multimeter is set to measure AC volts (V~AC) or DC volts (V~DC), depending on whether you’re measuring AC or DC current.
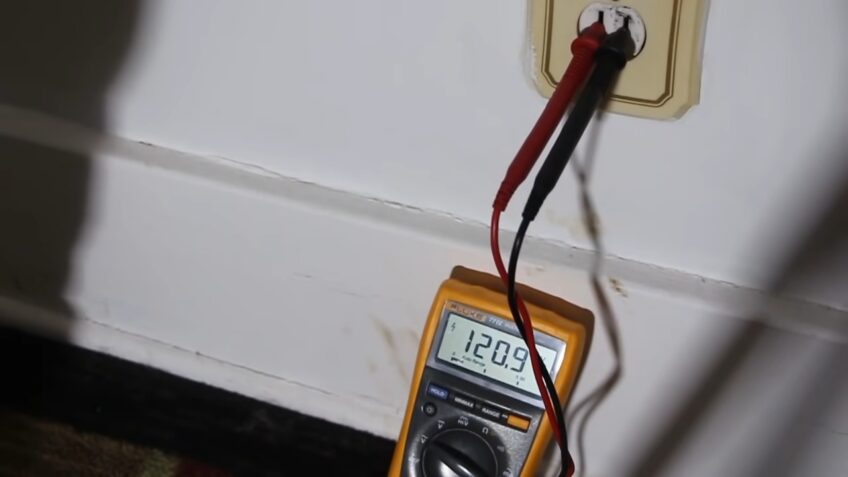
Next, make sure that your multimeter’s voltage range setting matches what you are testing. For example, if you are measuring a 120V outlet, make sure your multimeter has been set to read within 0-125V. If the setting is too high, there will be no issue; however, if it’s too low, there can be dangers such as missed readings and possible electric shocks when conducting tests on higher voltages.
Connect the Multimeter
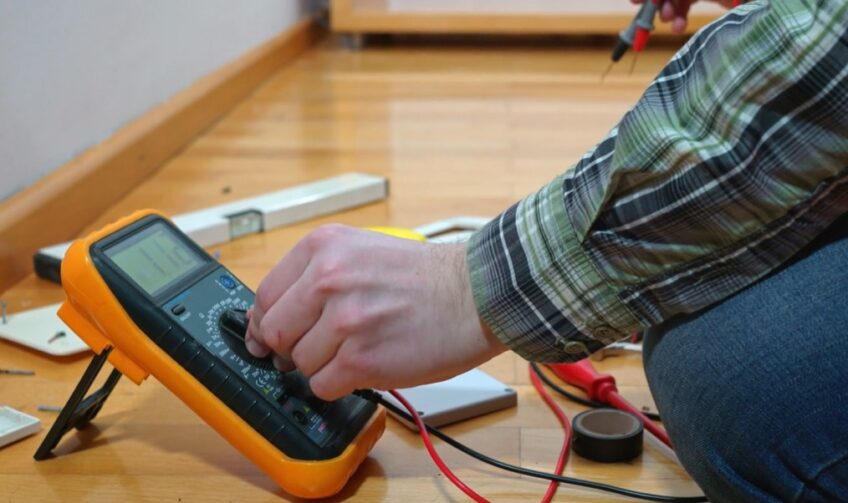
Before you begin testing the voltage of live wires, you’ll need to make sure your multimeter is set up properly and safely. Connect the multimeter probes to the correct ports on the device and be sure to turn off all power to the circuit you will be testing. Finally, set the multimeter to the correct setting for measuring voltage.
Set the multimeter to measure the voltage
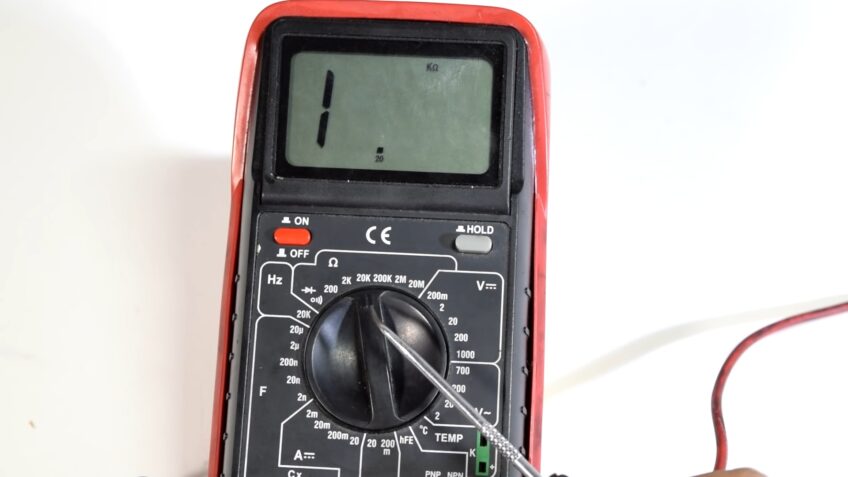
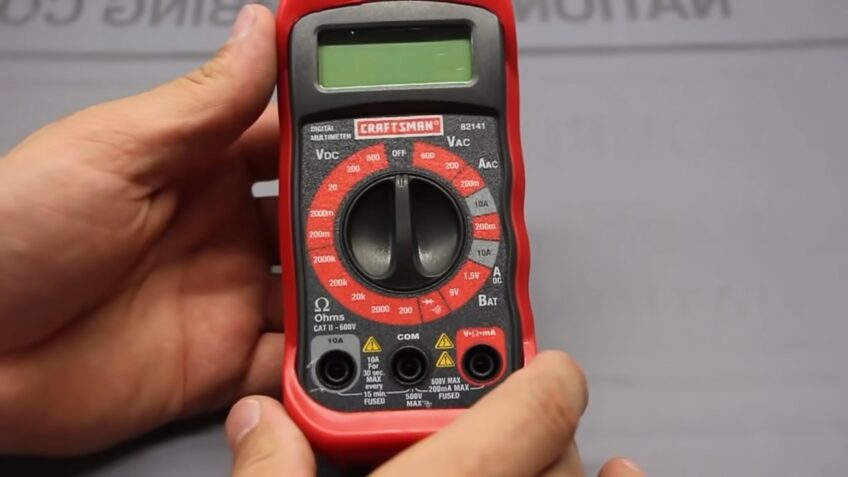
Setting the multimeter correctly is essential to ensure a safe and accurate reading. Start by turning both knobs at the top as far left as possible, creating the lowest “voltmeter scale” available on that multimeter. Next, select V (V for voltage) or DC (DC for direct current) mode, depending on which one your multimeter has.
Next set the range to fit your expected measurement by adjusting one of the dials. Keep in mind that the chosen range should be inside of the expected measurement so you can get an accurate reading. For example, if you suspect a wire is carrying 110 volts of electricity, then choose 200 volts range instead of 20 volts range on your multimeter so you don’t overload it.
Once you’ve set your metre scale and range, you can start measuring. Your meter should display both peaks and averages of AC currents as it tests them with its two probes. Keep in mind that voltage measurements aren’t always constant – certain conditions can cause fluctuations in voltage levels like when a motor starts or stops running – so it’s important to take multiple readings before taking any further action based on a single result.
Connect the black lead to the common jack
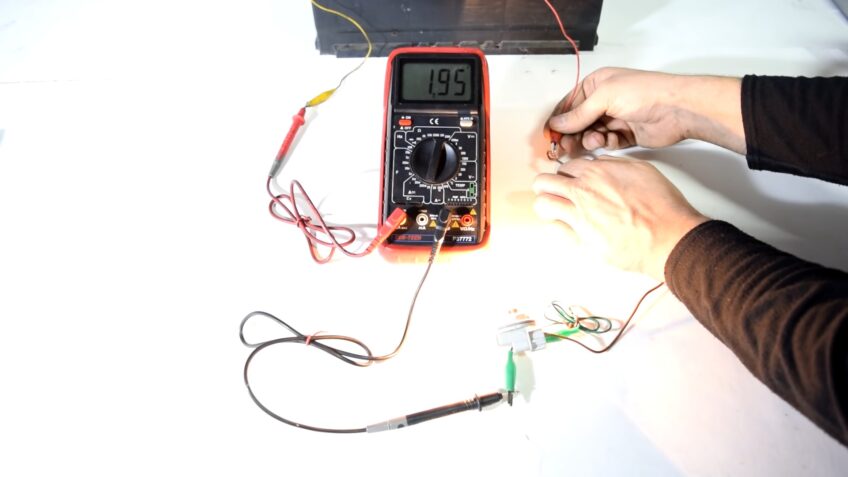
To connect the multimeter to a live wire, the black lead from the device must be connected to the “common” jack, which is generally labeled with a small “COM” on the front of the multimeter. The other lead will attach to either the voltage jack or current jack on the device.
Before attaching any leads, make sure that your power source is turned off as to not shock yourself or anyone else when connecting your multimeter. Firmly push each lead into its respective port and make sure it is snug and secure so that there is a good contact between the multimeter and your source of power. After confirming your connections are secure, you can turn on your power source if necessary and begin testing voltage levels.
Connect the red lead to the voltage jack

Connect the red lead to the voltage jack on the multimeter. Before doing this, ensure that you have set the dial to measure voltage. This can be done by rotating the dial until it lines up with the V symbol. Alternatively, you may see a number with an “ACV” or “DCV” label – make sure it is set to the correct symbol for your particular project.
The voltage jack is usually located at the bottom of multimeters and has a slight indentation or outline where you can insert one end of the test leads. Once inserted, press firmly down a few times until it is secure and not loose in any way. If there is any resistance when connecting or tightening, do not force it; just carefully adjust as needed until snug in place.
Testing the Voltage
Testing the voltage of live wires is a critical part of electrical work. While doing so, it is important to take the necessary precautions to ensure your safety.
Using a multimeter is an effective way of testing the voltage of live wires. In this article, we will discuss the basics of using a multimeter to test voltage of live wires.
Place the black lead on the negative terminal
The first step in using a multimeter to test the voltage of live wires is to make sure the multimeter is off and set it to read DC Voltage. Then, you will attach the two lead wires, each marked with a different color, onto your multimeter. Attach the red lead wire to the positive terminal of your device, and attach the black lead wire to the negative terminal. Make sure that both leads are firmly attached, and then turn on your digital multimeter.
Next, you will touch each of the probes of your multimeter to either end of an open circuit—the two leads giving off electricity—successively until you see a steady reading on your display.
Once this happens you can measure voltage by crossing one of your probes with another probe connected directly or indirectly to the ground – a zero-point reference from which all other voltages are measured—and keep another probe connected directly or indirectly with any element in an electrical field still connected with ground.
Finally, after reading and recording data about voltage or resistance within a live circuit system, remember to return each wire and its corresponding lead appropriately before turning off the device power.
If done correctly and taking appropriate cautionary steps throughout these procedures, you’ll have successfully tested voltage using a multimeter safely and accurately gained useful information about electricity flowing through live wires.
Place the red lead on the positive terminal
When testing the voltage of live wires, it is important to take all necessary safety precautions. A multimeter, also known as a digital or analog voltmeter, is an electrical device used to measure the AC (alternating current) and DC (direct current) voltage of a circuit. Before beginning the testing process, it is essential to make sure your multimeter is properly set up and that you understand all of its settings.
Once your multimeter is ready to use, begin by connecting one end of the test lead wire to the “V” port on your multimeter. Then place the red lead on the positive terminal and the black lead on the negative terminal in order to measure DC voltage or, if measuring AC voltage, put both leads on their respective terminals without crossing them. Take careful note of all readings to record accurate results.
Always remember that when working with electricity or using a multimeter there are risks involved; be sure to adhere to recommended safety protocols when taking measurements from live wires.
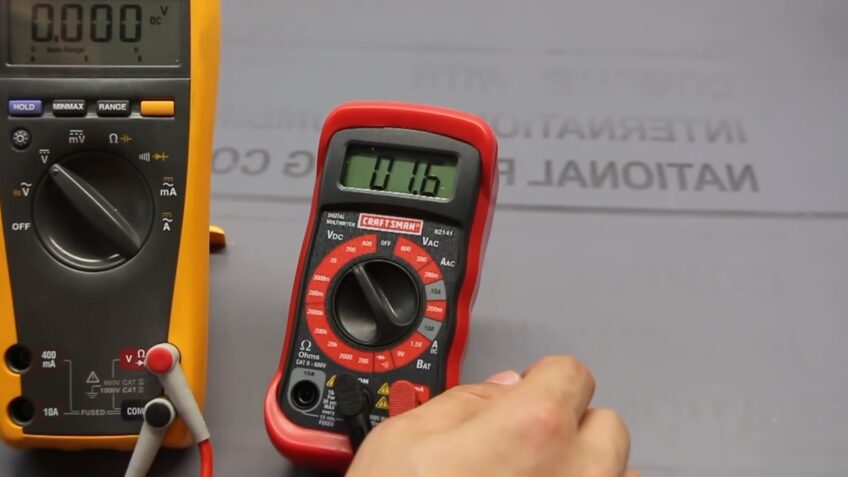
Read the voltage on the multimeter’s display
To accurately measure electrical voltage, follow the manufacturer’s instructions for operating the multimeter. Depending on the type, you may need to select a mode on the multimeter and then attach its leads before measuring a live wire.
When testing a live wire, your multimeter will work as an ammeter and show you the voltage that is running through the circuit. Different types of voltmeters may require different levels of expertise to use but most utilize one or two probes which are connected to wires attached to a device or circuit being tested.
Once the probes are attached, recheck that they’re secure and press down any power button if present. Then look carefully at your multimeter’s display; if it turns on, it should declare what measurement is being taken (Voltage/Amperage) and how much of either is being measured in actual numbers.
You may need to set up your meter by putting it in either DC (Direct Current) or AC (Alternating Current) mode depending on the type of probing limits needed for measuring particulate circuitry’s voltage levels. Make sure you specify this before starting in order to get accurate readings from your testing.
Troubleshooting
The multimeter is a versatile tool that can be used to troubleshoot electrical issues. One of the uses of the multimeter is to measure voltage of live wires. To do this, you need to make sure you turn off the circuit breaker and set your multimeter to the correct settings.
We’ll discuss in more detail how to properly use a multimeter to measure voltage of live wires.
Check the leads for signs of damage
When you’re ready to use your multimeter to test the voltage of live wires, make sure to check the leads for any signs of damage. You don’t want to risk causing injury later on by using leads that might have frayed or damaged insulation. Any visible damage should be reported immediately.
Before beginning your testing, make sure to carefully choose your most suitable testing range with LCD adjustment dials on the multimeter. Some digital multimeters allow you to switch between AC and DC current readings as well as adjustable testing ranges suitable for different types of components.
After having adjusted the settings, it is time to make the circuit connection where the probes are placed on either side of the voltage source or circuit node you wish to check. Red probe is typically associated with positive terminals whereas black probe is associated with negative terminals and ground potentials.
The tension can then be read from a digital display or an analogue scale located near or below the measuring setup controls of your multimeter. It is important also to note that there are different markings for each type of alternate current which vary depending on different country standards for safety regulations when dealing with household wiring circuits.
Safety protocols should always be observed when handling electrical equipment and components such as live wires – in this case it’s always better safe than sorry!
Check the power source for signs of damage
To start troubleshooting the issue, you first need to check the power source. Not only will this help you identify if the source is providing a sufficient amount of voltage but it will also indicate if there are any signs of damage that may be causing an issue with your device or appliance.
To do this, use a multimeter to test the voltage on live wires. Make sure that all other connected devices or appliances have been powered down and disconnected from the same power source before proceeding. Securely fasten two of the meter’s testing leads tightly onto both sides of the connection at either end of the wire and turn on your multimeter. Make certain to keep your fingers off of any exposed connections throughout this process as they could cause potential electrocution risk.
Once your multimeter is ready to go, it should tell you if there are any irregularities in voltage or current across those two points of contact. Ideally, you should never see meaningful differences between either one; however, small differences in voltage between each point (up to 2V) can be safely interpreted as negligible and should not require further investigation or additional equipment for repair purposes.
But if you detect any higher voltages than that – more specifically between 3-6V – then it’s best to avoid using this power source until an electrician can properly inspect and repair it as necessary.
Double-check the voltage setting on the multimeter
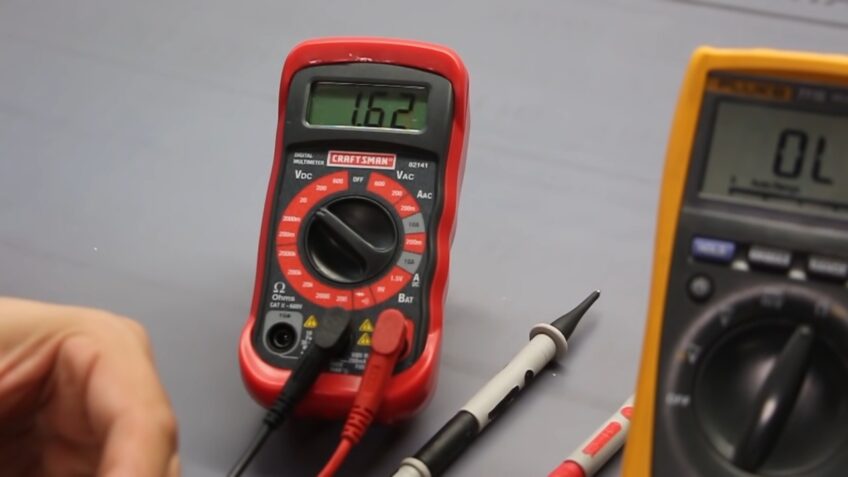
Knowing the voltage setting on the multimeter is essential for accurate readings. Before beginning, double-check that it is set to AC (alternating current) or DC (direct current), depending on which you are measuring. If the voltage selected on your multimeter matches the type of circuit you’re testing, you should be ready to begin.
Generally using an automatic setting is preferred, as this adjusts the voltage setting according to what it detects. It’s best practice to test a known live circuit first, such as a wall plug or switch with known power supply, in order to verify calibration and accuracy of your measurements.
FAQs
1. Is it safe to test voltage on live wires?
Testing it on live wires can be dangerous and should only be done by someone who is trained and experienced.
2. What safety measures should I take before testing voltage on live wires?
Before testing it on live wires, make sure to wear protective equipment such as gloves and safety glasses. Also, ensure that the area is dry and that there are no flammable materials nearby.
3. How do I know if the multimeter is set to the right range?
The multimeter should be set to a range higher than the voltage you expect to measure. If the range is too low, the multimeter may be damaged.
4. What is AC voltage?
It is the voltage that alternates in direction and is commonly found in household electrical systems.
5. What is DC voltage?
It is the voltage that flows in a single direction and is commonly found in batteries and electronic devices.
6. How do I switch the multimeter from AC to DC voltage?
To switch the multimeter from AC to DC, turn the dial on the multimeter to the voltage setting and press the AC/DC button until it displays the type of voltage you want to measure.
7. What should I do if the voltage reading is too high?
If the reading is too high, turn off the power source and seek the help of a professional electrician.
Conclusion
In conclusion, learning how to use a multimeter to test the voltage of live wires is an essential skill for anyone who works with electrical equipment or wiring. By following the steps outlined in this guide and taking the necessary safety precautions, you can accurately and safely measure the voltage of live wires, helping you to identify potential issues and prevent electrical hazards.
Remember to always wear appropriate protective gear and handle electrical equipment with care. With practice and experience, using a multimeter will become second nature and you will feel more confident in your ability to safely work with live wires.