Ryobi is a well-known brand when it comes to power tools and their batteries. However, even the best batteries can malfunction, leaving you frustrated and unable to complete your work. If you find yourself in a situation where your Ryobi battery won’t charge, don’t worry – there are several things you can do to fix the problem. This guide will take you through the step-by-step process of identifying and fixing the issue with your Ryobi battery.
We will cover common causes of the problem and provide tips on how to prevent it from happening in the future. Whether you’re an experienced DIYer or a novice, this guide will help you get your Ryobi battery back in working condition and save you the cost of having to replace it. So, let’s get started and learn how to fix a Ryobi battery that won’t charge.
Diagnose the Problem
If your Ryobi battery won’t charge, the first step is to diagnose the problem. First, check to make sure it is securely connected to the charger. You may need to try connecting it to a different charger or outlet.
If the connections are secure, try charging it for a few hours as it may have just been completely drained. If that doesn’t work, you may have to take the battery apart and inspect the connections.
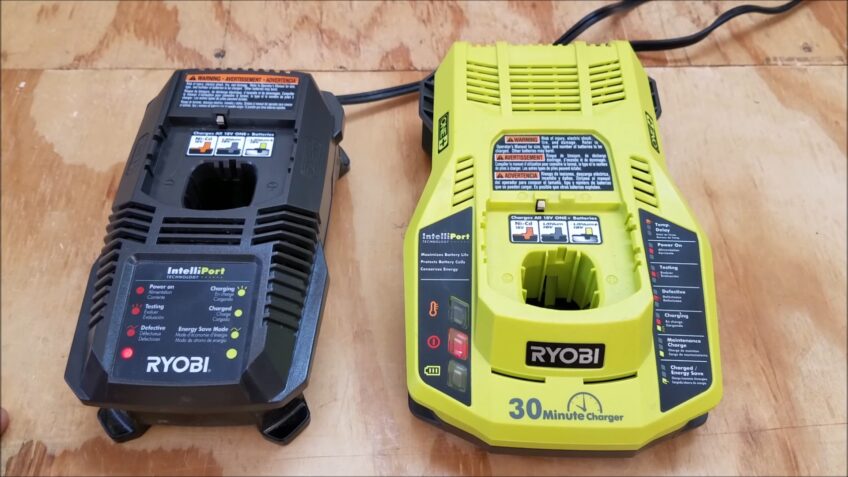
Check the charger
Make sure that it’s plugged into a working outlet and that the charger’s indicator light is lit up. If it isn’t, try another outlet or plug the charger into another device to make sure the output voltage is right.
If the indicator light is on, unplug and reset the charger by pressing and holding its power button for 10 to 15 seconds. After this time has passed, plug it back in and try charging the battery again.
If you have multiple chargers, test each of them on different outlets to make sure none of them have stopped working properly. If you don’t have multiple chargers, borrow one from a friend or family member or buy one at your local Ryobi dealer or home improvement store. This is important because sometimes they will not charge if they are connected to a weak or unbalanced charger.
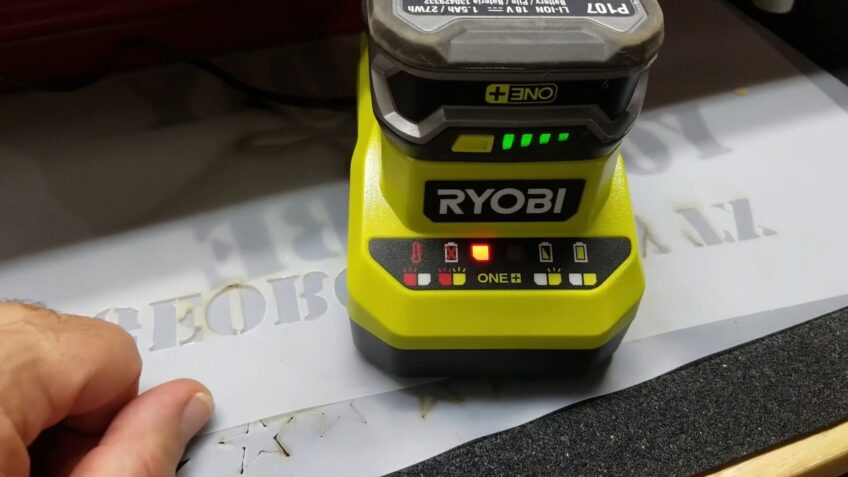
Check the battery
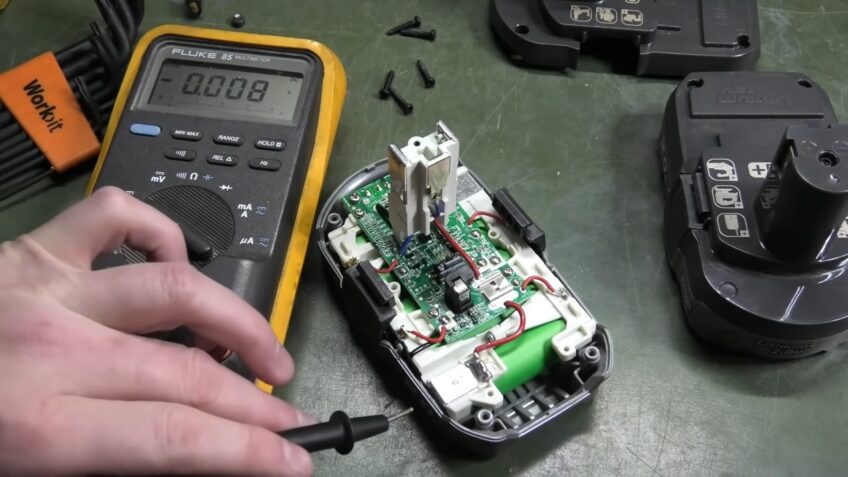
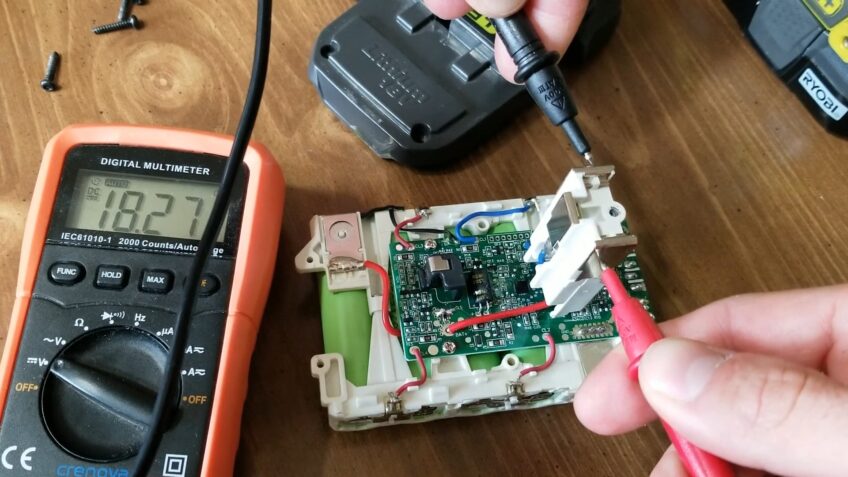
Before attempting any other diagnostics, check to make sure it is receiving the correct voltage. Using a multimeter, set the meter to measure DC volts (identified with a Volts or V symbol). Place the test leads of the meter on two of the terminals on the battery and take a reading. Depending on your type, you should receive a reading between 12V and 18V. If you’re getting any more or less than this range then it’s likely that it won’t charge due to a faulty charger or power source.
If the voltage is correct, then the next step is to check for current running through it. With the same multimeter set on DC current (identified with an Amps or A symbol), place one test lead on each terminal and measure between them. The current should register somewhere between 0-1 Amps for Lithium Ion batteries and below 0-4 Amps for NiCd/NiMH batteries.
It’s likely that if you’re not getting any voltage then it isn’t receiving enough power but if it does have appropriate voltage levels but no current running through it then there may be an issue with one of its cells or terminals. To ensure optimal performance from your Ryobi battery make sure its cells are free from corrosion and its terminals are securely attached and making good contact with their respective posts when in use.
Troubleshooting
In this section, we will go over some common issues with Ryobi batteries and the possible solutions to fix them. We will take a look at the most common causes of not charging, from faulty chargers to damaged battery terminals.
Clean the battery contacts
The battery terminals on it are designed to provide consistently stable power by creating an electrical connection between the battery and its charger. Unfortunately, if these contacts become dirty, corroded, or damaged, the charge may be disrupted. To ensure a continuous connection, you should clean the contacts regularly.
To properly clean Ryobi’s battery contacts, you need to remove any debris and contaminants. Start by brushing away any dirt or debris around the contacts using a soft-bristled brush. If there is visible corrosion present, use 000-grade steel wool to scrub it away. Once you have removed all of the debris, dry off the contacts with a lint-free cloth before reinserting them into their charger. Once inserted in the charger, ensure both connections are snugly fit with no gaps or openings which can disrupt charging and prevent your tool from working properly.
Check the voltage
When troubleshooting a Ryobi battery that won’t charge, the first step is to check the voltage. You will want to use a multi-meter or digital voltmeter with proper safety precautions to measure the voltage of the battery. The voltage should be no less than 20V for a fully charged battery. If it is lower, it means that it needs to be charged in order for it to work properly.
Once you have determined that it needs charging, you will then need to determine what type of charger is compatible with your particular model of it. Most of them require an AC/DC dual output charger for optimum charging results and long-term protection.
Once you have determined the proper charger and voltage settings and located an appropriate power source, plug in the charger and begin charging according to the instructions provided by your specific mode’s manual. Keep in mind that while all batteries require some kind of parity system, Li-ion and LiPo models are particularly sensitive and require special care during charging cycles, including using established cut-off levels like 4V/cell or equivalent levels when possible.
After connecting all of the necessary components required for charging (power adapter/source and charger), let it charge until complete, observing any additional instructions if applicable (like turning off the heating module before completing the final charge cycle). Once finished, disconnect from the power source, unplug items in reverse order (i.e., first unplugging from the power source before disconnecting from the device), and store them in an appropriate manner according to individual instruction guide prior to use again.
Check the fuse
If the Battery on your Ryobi tool is not charging or it won’t power up, the first step is to check the fuse. The battery on Ryobi tools contains a minimum of two fuses that you must manually check to make sure they are working properly.
The first fuse is located near the battery and can be accessed by removing the screw that holds it in place. If this fuse looks good, you will then need to remove the fuse cover located at the other end of it. This cover will open to reveal another fuse which may need to be replaced if it appears to be damaged.
It is important that these fuses have continuity and are firmly seated in order for the battery charge indicator lights to work properly.
Once both fuses have been checked, try recharging them by plugging them into a compatible charger and allowing sufficient time for a full charge. If your Ryobi tool still does not power up after replacing a blown fuse, then there may be an underlying issue with either the charger or your tool that requires professional service.
Replace the Battery
If your Ryobi battery won’t charge, the most likely culprit is a dead or damaged battery. If it is dead, you will need to replace it in order to get your Ryobi device working again. Replacing it is an easy and cost-effective fix that can be done in a matter of minutes.
Read on to learn how to replace it and get your device up and running again.
Purchase a new one
Replacing it in your Ryobi device is a great way to get it back into working condition. The first step for this repair is to purchase the correct new battery, which can vary depending on the model and voltage of your Ryobi device.
If you are not able to determine which type your device requires, you can usually refer to the documentation provided with your Ryobi tool or contact their customer service team to help identify the correct replacement. If a generic replacement is available, be sure to select one specifically designed for use with Ryobi products.
When shopping for a new one, it’s important to pay attention to the stated amp-hour (Ah) rating and voltage of the product — higher value ratings indicate that it will provide more power and last longer than batteries with lower value ratings. Additionally, when selecting from different types (e.g., lithium-ion or nickel-cadmium), keep in mind that each type has its own benefits and drawbacks when it comes to cost and performance. Finally, be mindful of both online reviews regarding quality as well as any warranty offered on the product before purchasing a new battery for your Ryobi device.
Install the new battery
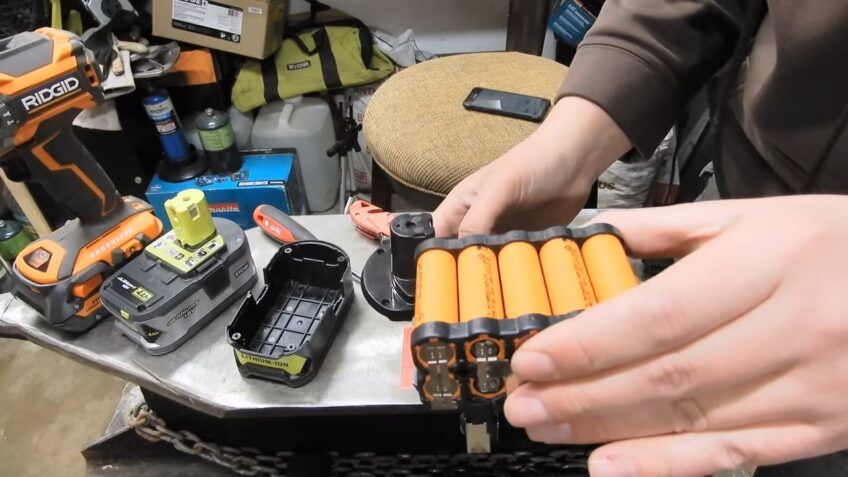
Once the old one is removed from your Ryobi tool, the next step is to install the new battery. All of them are built with lithium-ion cells and are designed to fit into many popular models of Ryobi tools.
To install a new one, simply place it into your tool’s compartment and secure it by pushing down on each of the corner notches until they snap into place. Ensure that the battery is properly seated in its compartment and that all electrical contacts are correctly aligned before continuing.
It’s important to make sure the contacts do not get bent or pinched when snapping them into place as this may interfere with the proper functioning of your device. Once you have installed the new one and snapped it securely into place, you can proceed to charge it for use in your tool.
Maintainance
One of the most important aspects of making it last longer is to take care of it. Regular maintenance and upkeep of the battery are key to getting the most out of its life. This means keeping the terminals clean and free of corrosion, checking the voltage regularly, and making sure your charger is in good condition.
Let’s take a closer look at some of the maintenance steps you can take to extend the life of your Ryobi battery.
Store the battery in a cool, dry place
The most important part of storing it is to keep it away from extreme temperatures and water. Store the battery in a cool, dry area that is not exposed to direct sunlight or moisture. Avoid using poor-quality wooden storage containers like those made of cedar, which can cause the metal contacts to corrode. If you must use a container, opt for one with an airtight seal that won’t let in any moisture.
It’s also important to store it in an upright position and make sure there are no cables attached; never leave the charger plugged into it for extended periods of time. Be sure to remove any stored objects in the same container as your battery, as these can short it out or interfere with its operation.
Last but not least, if you’re storing multiple batteries together, do not allow them to touch each other — doing so could cause damage to each one due to electrical current transfer between them.
Discharge it completely before recharging
Discharging it completely and recharging it back up can be one of the most effective fixes for a Ryobi battery that won’t charge. To do this, leave the charger unplugged and remove it. Make sure that all power is off and that no devices are connected to it while you’re discharging it.
Once the battery is discharged, replace the charger and plug it in until it is fully charged again. This procedure should be done at least once per month to ensure the good performance of your Ryobi battery. It will also help extend its lifespan as a result.
Once complete, you’re ready to start using your tools again!
Keep the battery contacts clean
They can become corroded or lose their connection between charge-discharge cycles due to their exposure to outside elements and continual vibration in the device. In order to keep the battery contacts working correctly and efficiently, they should be checked periodically, and cleaned if necessary.
Cleaning them is an easy process that only takes a few minutes. Start by disconnecting the battery from any tools or chargers it may be connected to. Gently scrub away any dirt, dust, or corrosion from each contact using a stiff wire brush or steel wool. To restore a secure connection between the battery and its charger (or other tools), use a cotton swab soaked in rubbing alcohol to clean each contact point before reconnecting them.
Finally, apply a thin layer of petroleum jelly to both contacts for additional protection against corrosion and voltage loss over time due to oxidation. If done regularly this simple maintenance will ensure your Ryobi battery lasts for many charging cycles.
FAQs
Can I replace the battery cells in my Ryobi battery?
Yes, you can replace the faulty battery cells in it, but it requires some technical knowledge and expertise.
How can I prevent my Ryobi battery from getting damaged?
You can prevent it from getting damaged by storing it in a cool, dry place, avoiding overcharging or over-discharging the battery, and using it regularly.
Can I use a non-Ryobi charger to charge my Ryobi battery?
It is not recommended to use a non-Ryobi charger to charge your Ryobi battery, as it could damage it and cause it to malfunction.
How long does a Ryobi battery usually last?
It can last anywhere from 2 to 5 years, depending on how frequently it is used and how well it is maintained.
How do I dispose of a faulty Ryobi battery?
You should dispose of a faulty Ryobi battery in accordance with your local recycling guidelines, as it contains hazardous materials.
Can a Ryobi battery be repaired by a professional?
Yes, it can be repaired by a professional, but it may not be cost-effective depending on the extent of the damage.
Can I use a Ryobi battery in other power tools?
Yes, you can use it in other Ryobi power tools, but it may not be compatible with other brands of power tools.
Conclusion
In conclusion, a Ryobi battery that won’t charge can be a frustrating problem to deal with, but it is often fixable with the right knowledge and tools. It is important to identify the root cause of the issue and try the appropriate solutions before deciding to replace the battery entirely. Whether it’s a faulty charger, damaged cells, or a simple cleaning issue, there are several steps that can be taken to extend the life of your battery and get it working properly again.
By following the tips and tricks outlined in this guide, you can feel confident in your ability to diagnose and fix a Ryobi battery that won’t charge. Remember to always prioritize safety when handling batteries and consult a professional if you are unsure about any aspect of the repair process. With a little patience and effort, you can keep your Ryobi tools running smoothly and save money by avoiding the need to constantly replace batteries.